How to Use the Microphones in the Studio at SCH
Getting started with the microphones in the Studio is just a few steps away. Follow this SOP and you'll most likely get there!
1. Prepare the Microphones
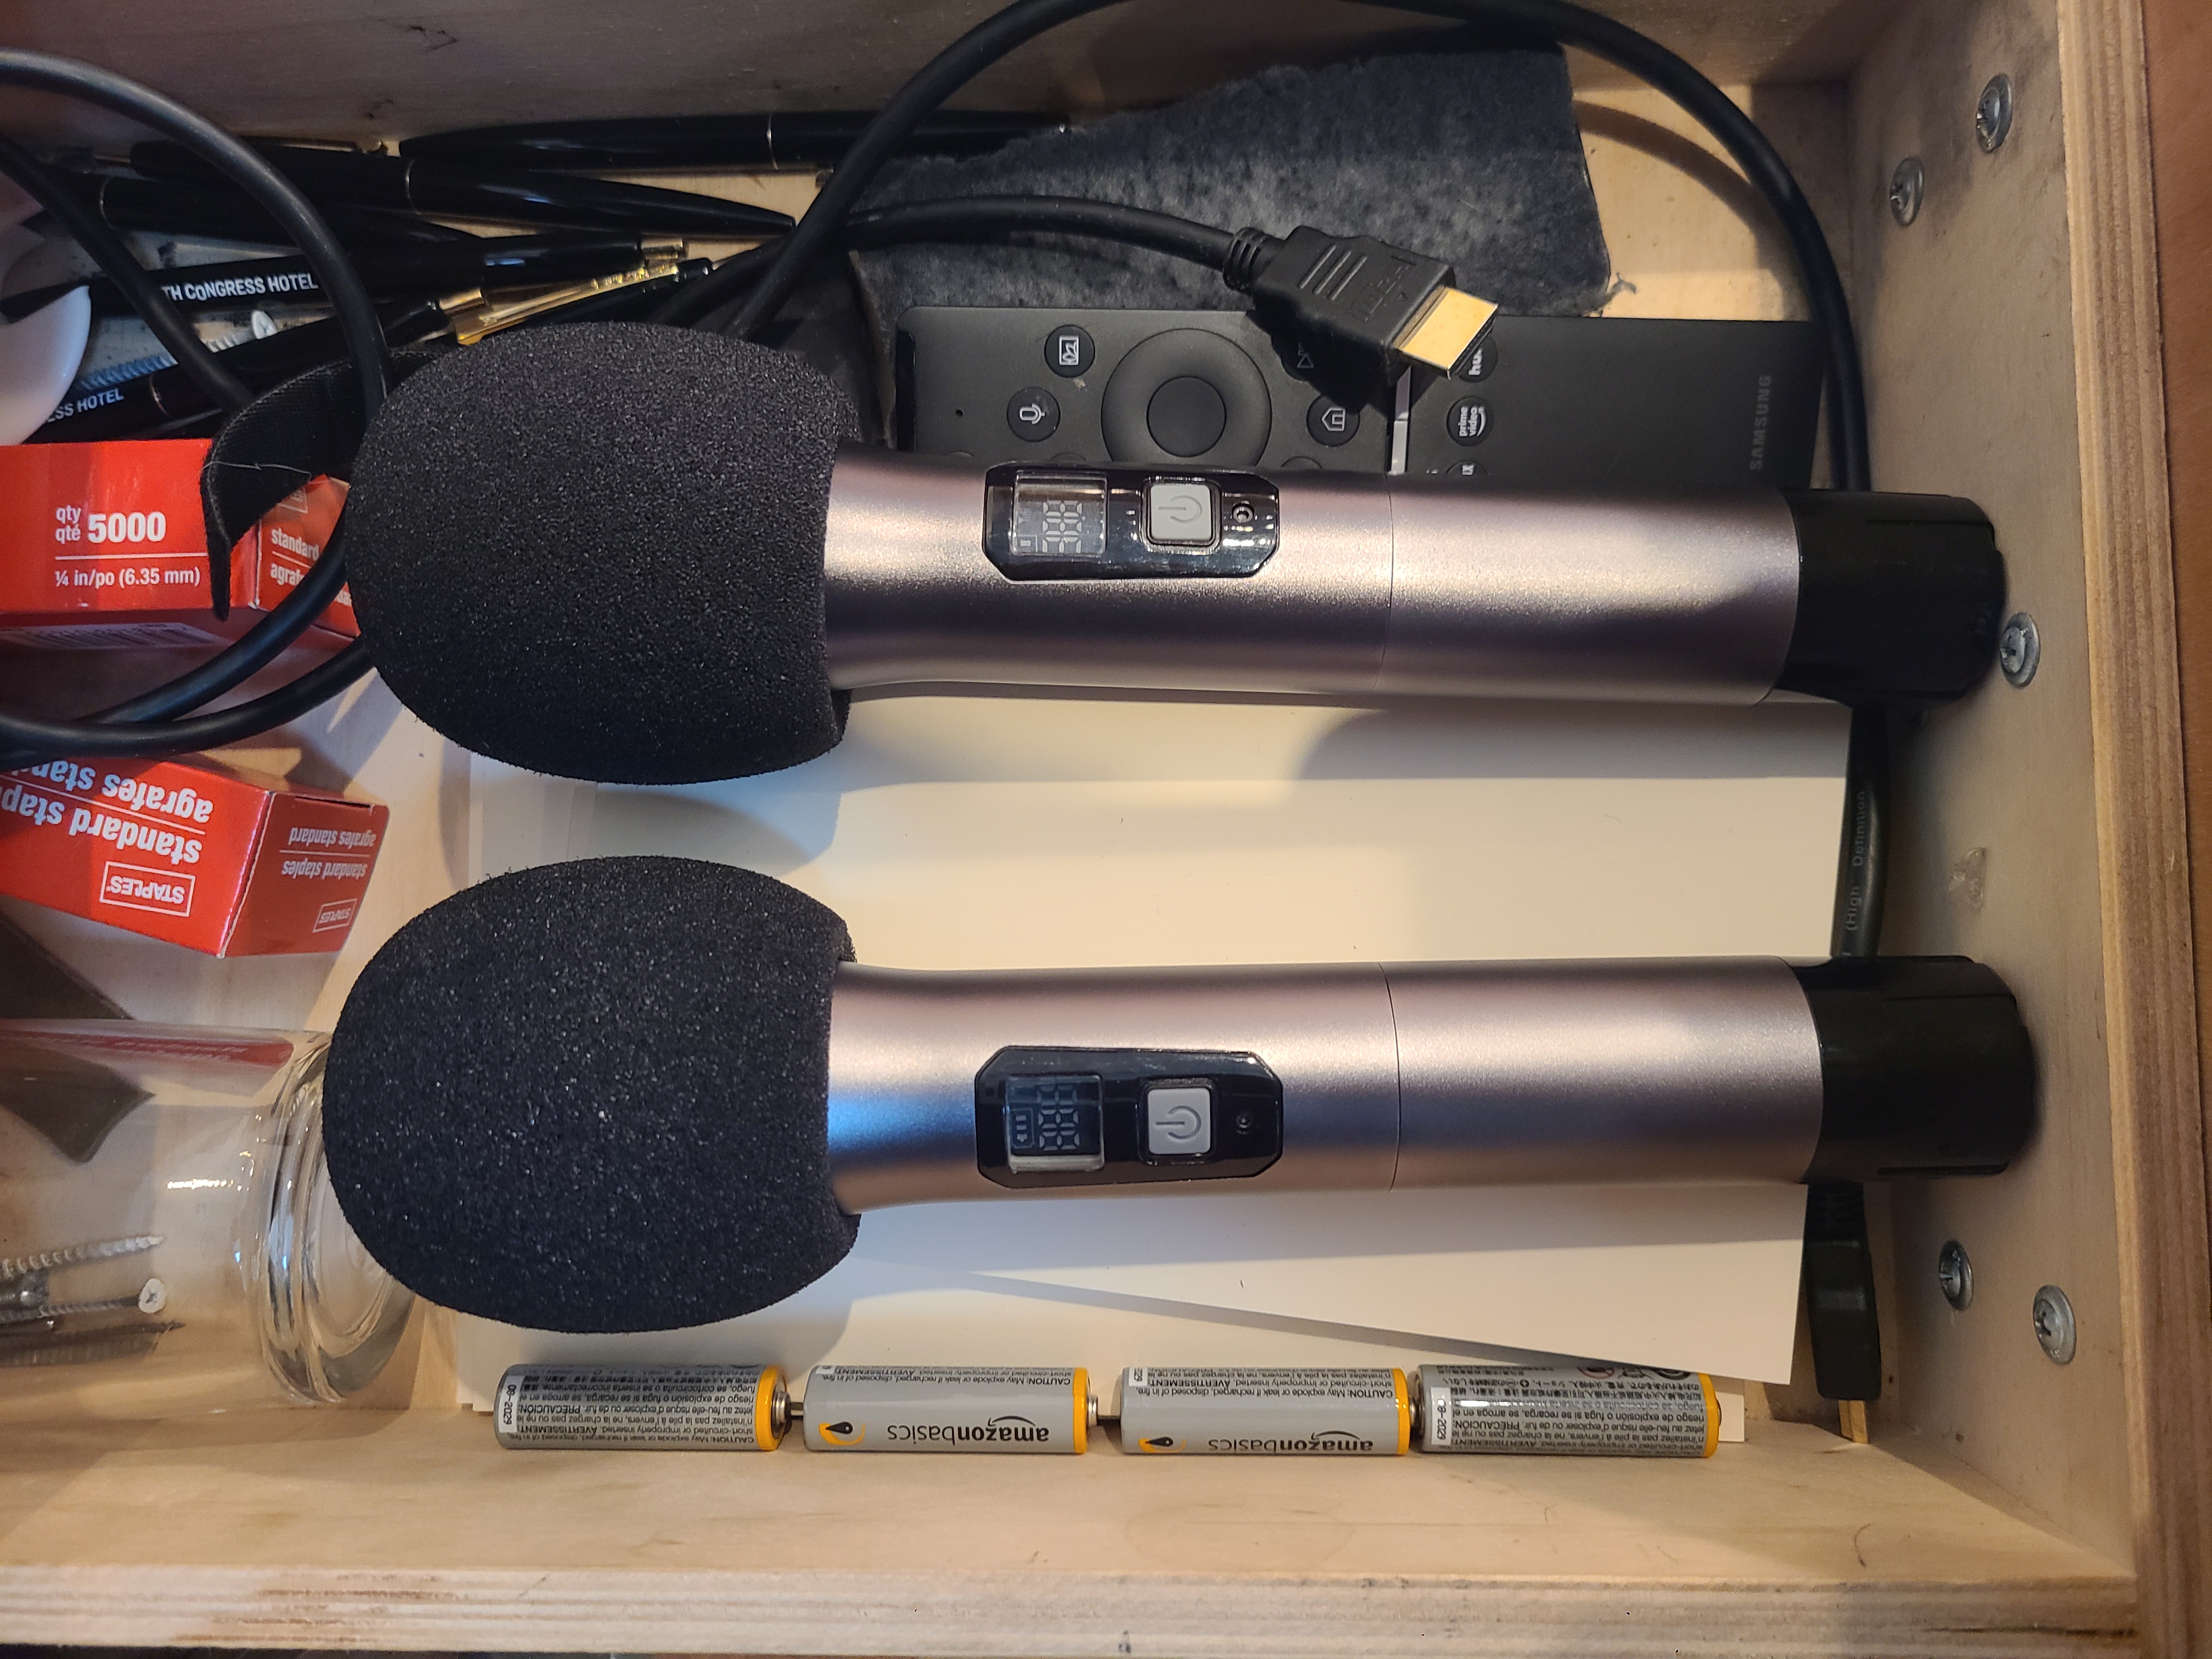
The microphones live in the same drawer as the TV remote, in the northeast corner of the space. They should be stored without batteries to prevent leakage and corrosion.
To insert batteries into the microphones, unscrew the bottom silver half from the top half. You should end up with this:
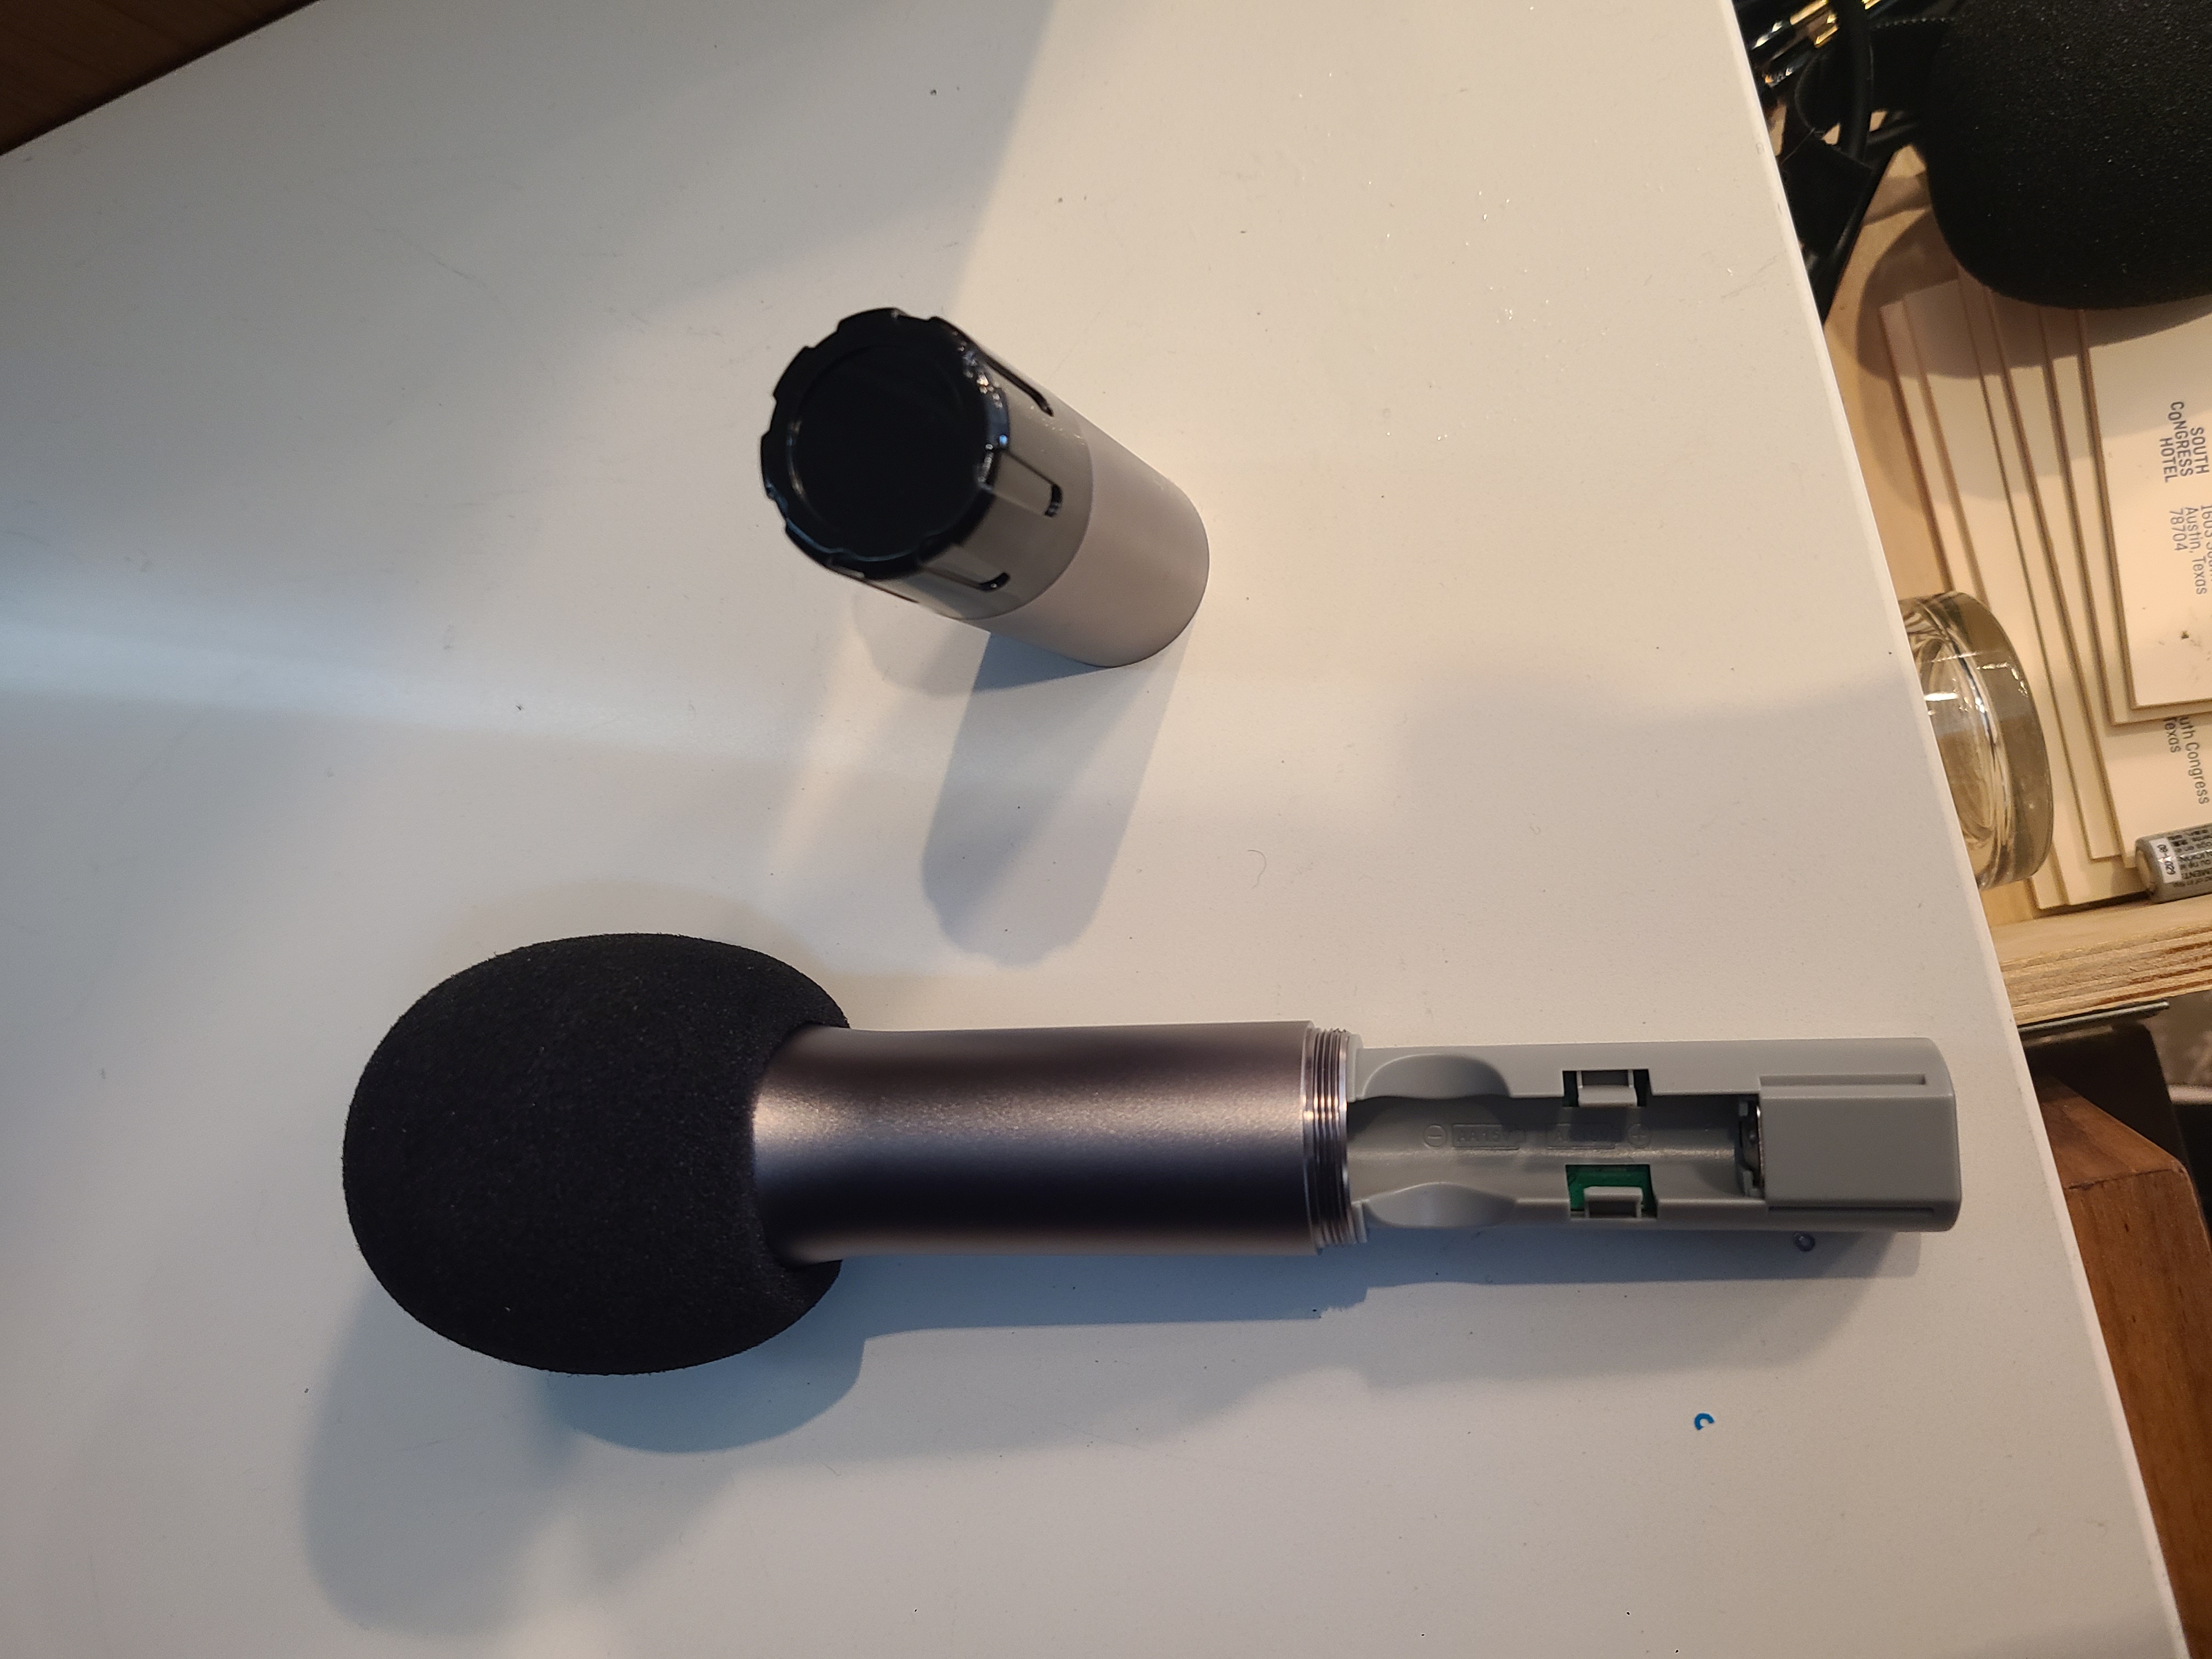
Follow the guide in the battery compartment to insert the two AA batteries in the correct orientation. Once inserted, screw the bottom half back onto the microphone.
2. Prepare the Receiver
Step into the Studio's back room and look on top of the fridge. Here you will find the microphones' receiver:
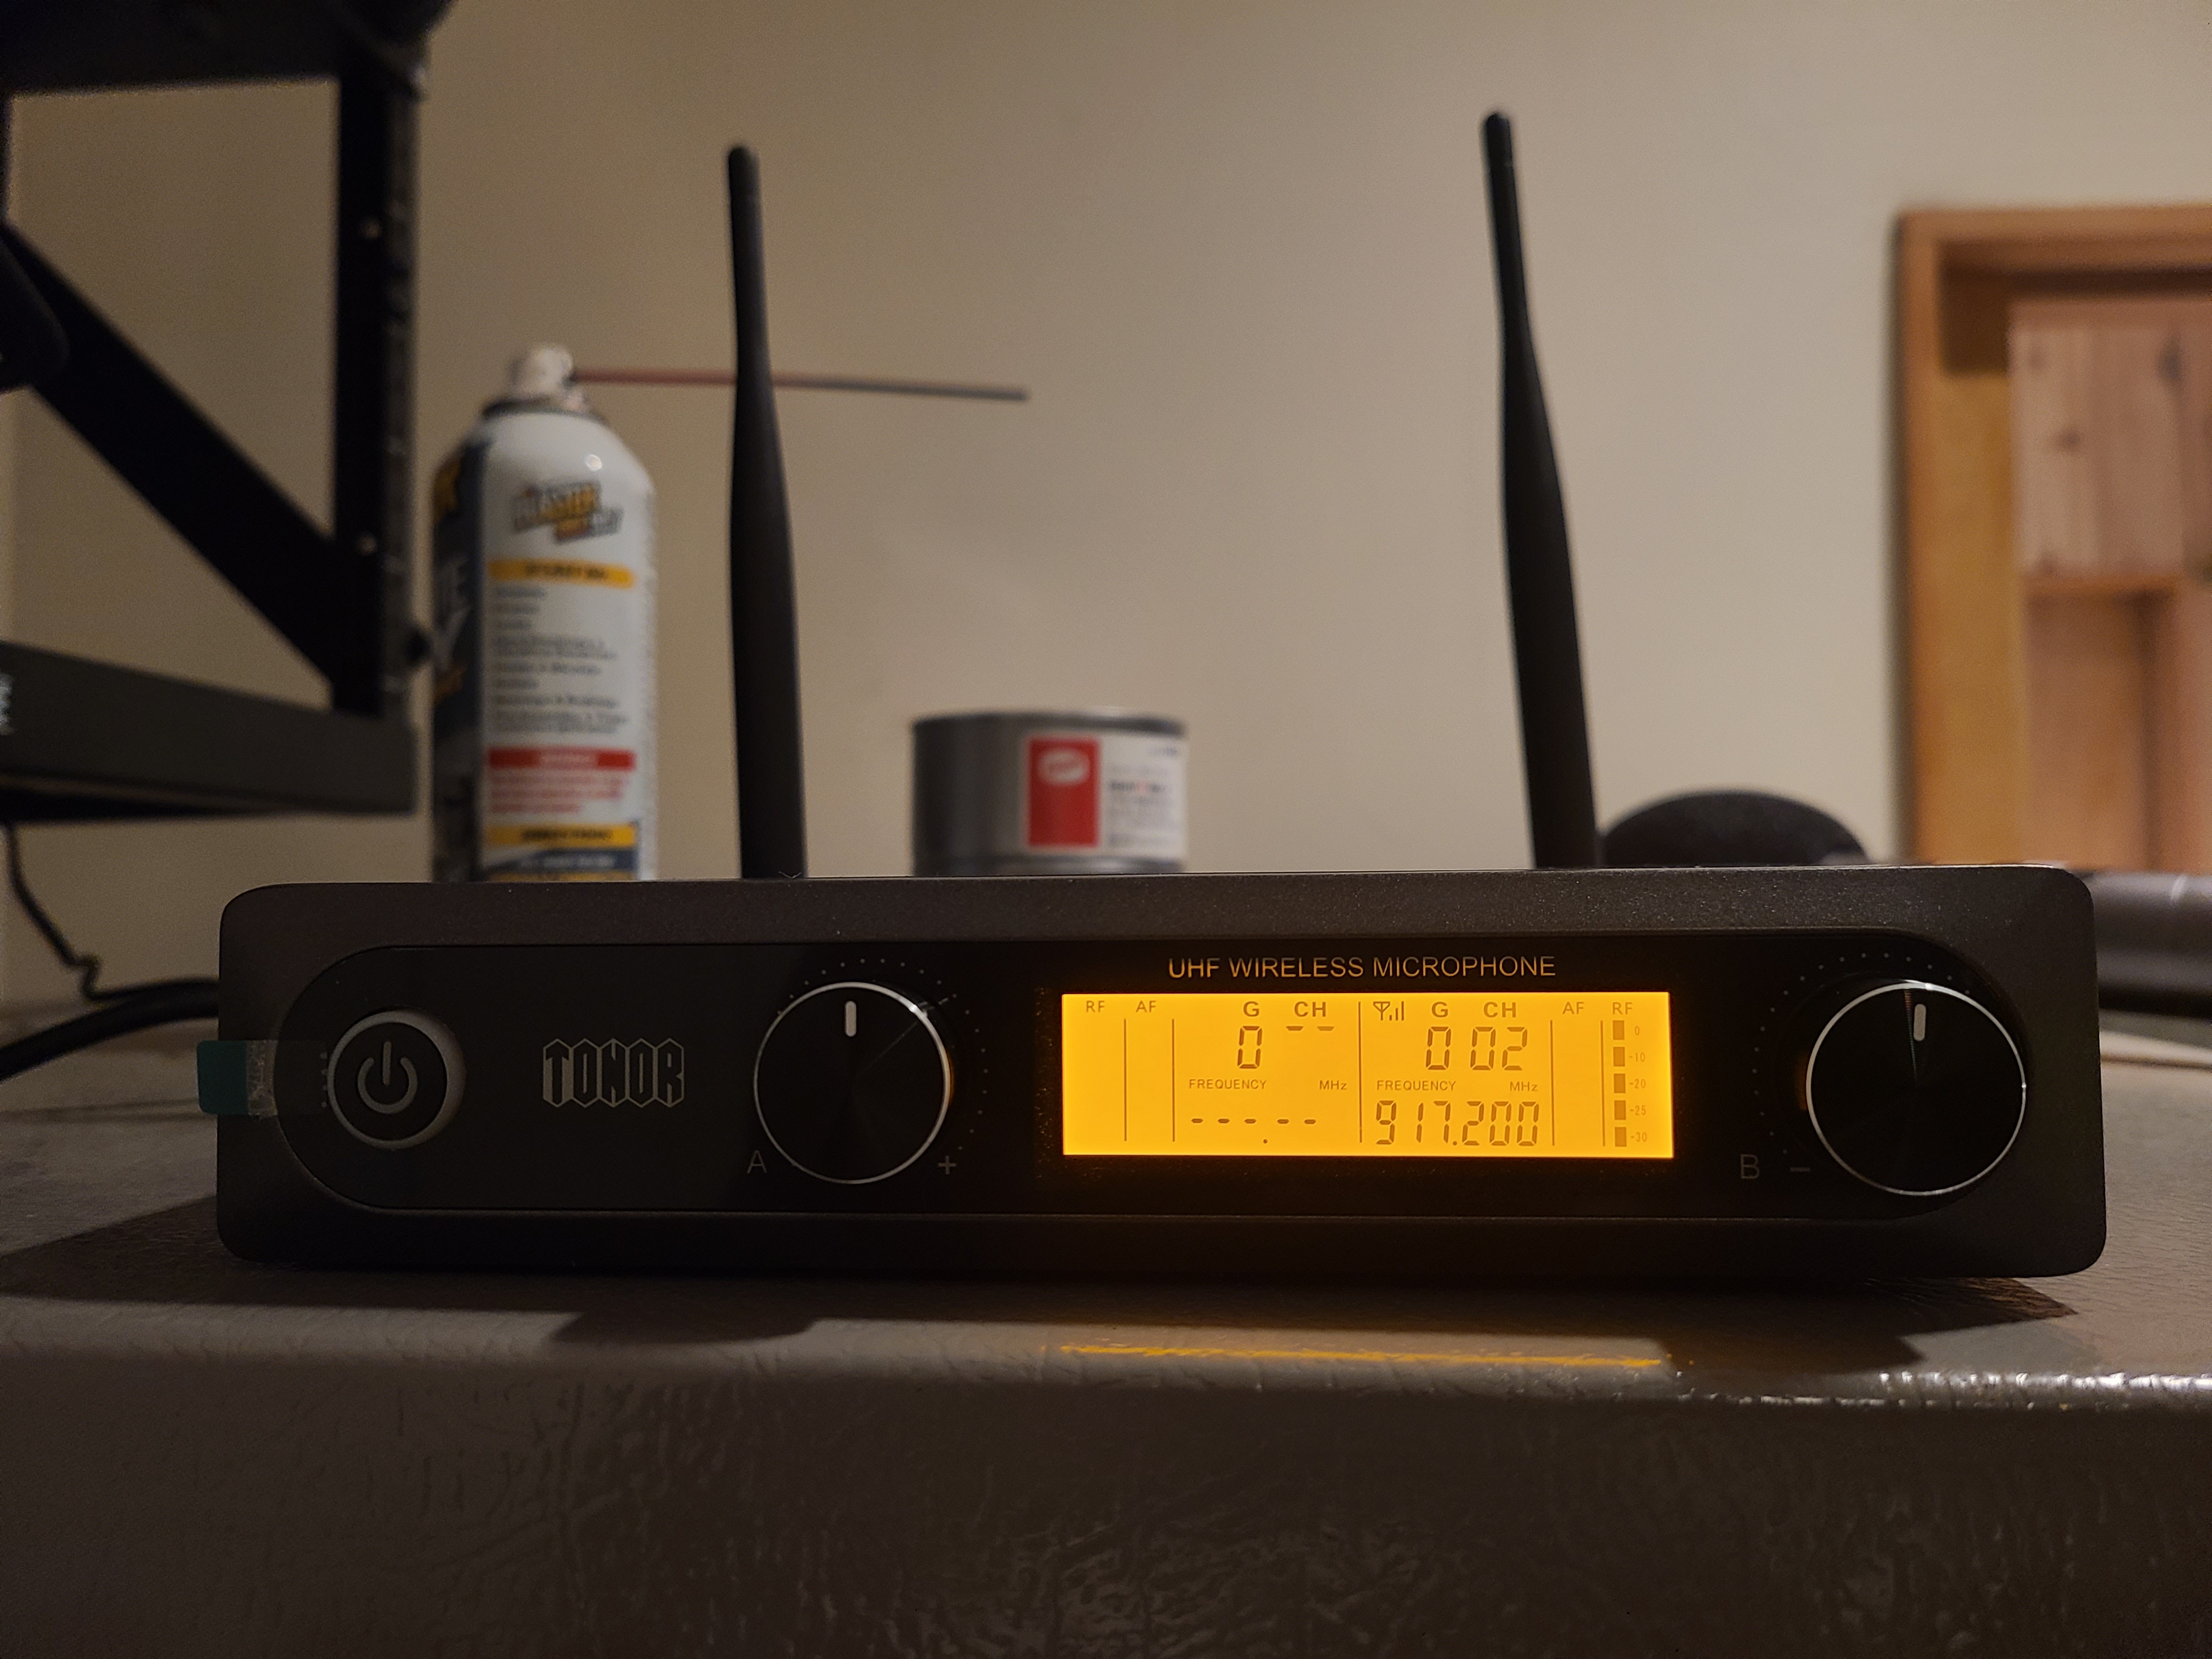
If the receiver is off, press and hold the power button on the far left to turn it on. The halfway point on the volume settings for microphones A and B should serve as a good starting point. Only use the dials on the receiver to adjust volume! The "MIC 1" dial on the amplifier should be left alone for the balance of the system as a whole.
3. Power on microphones and test
Press and hold the power button on one or both of the microphones until the screen lights up. The receiver's screen should light up with the same frequency that the microphone shows on its screen. From here, you can speak into the microphone and fine-tune the volume on the receiver's dial.
4. After you're done
Once the event is over and the microphones are ready to be put up, simply power off the receiver with a long press on the power button, do the same with the microphones, and remove the batteries from the microphones for storage.
5. Troubleshooting
1. Microphone doesn't turn on
Ensure that fresh, brand-new batteries are installed in the correct orientation, as provided by the battery compartment of the microphone. If this has been done and the microphone still doesn't power on, contact IT.
2. Interference or choppy audio
This is likely because you're sharing a frequency with a nearby device. To change the frequency of a microphone, unscrew the bottom silver half like you're going to remove the batteries and observe the Hi-Lo switch:
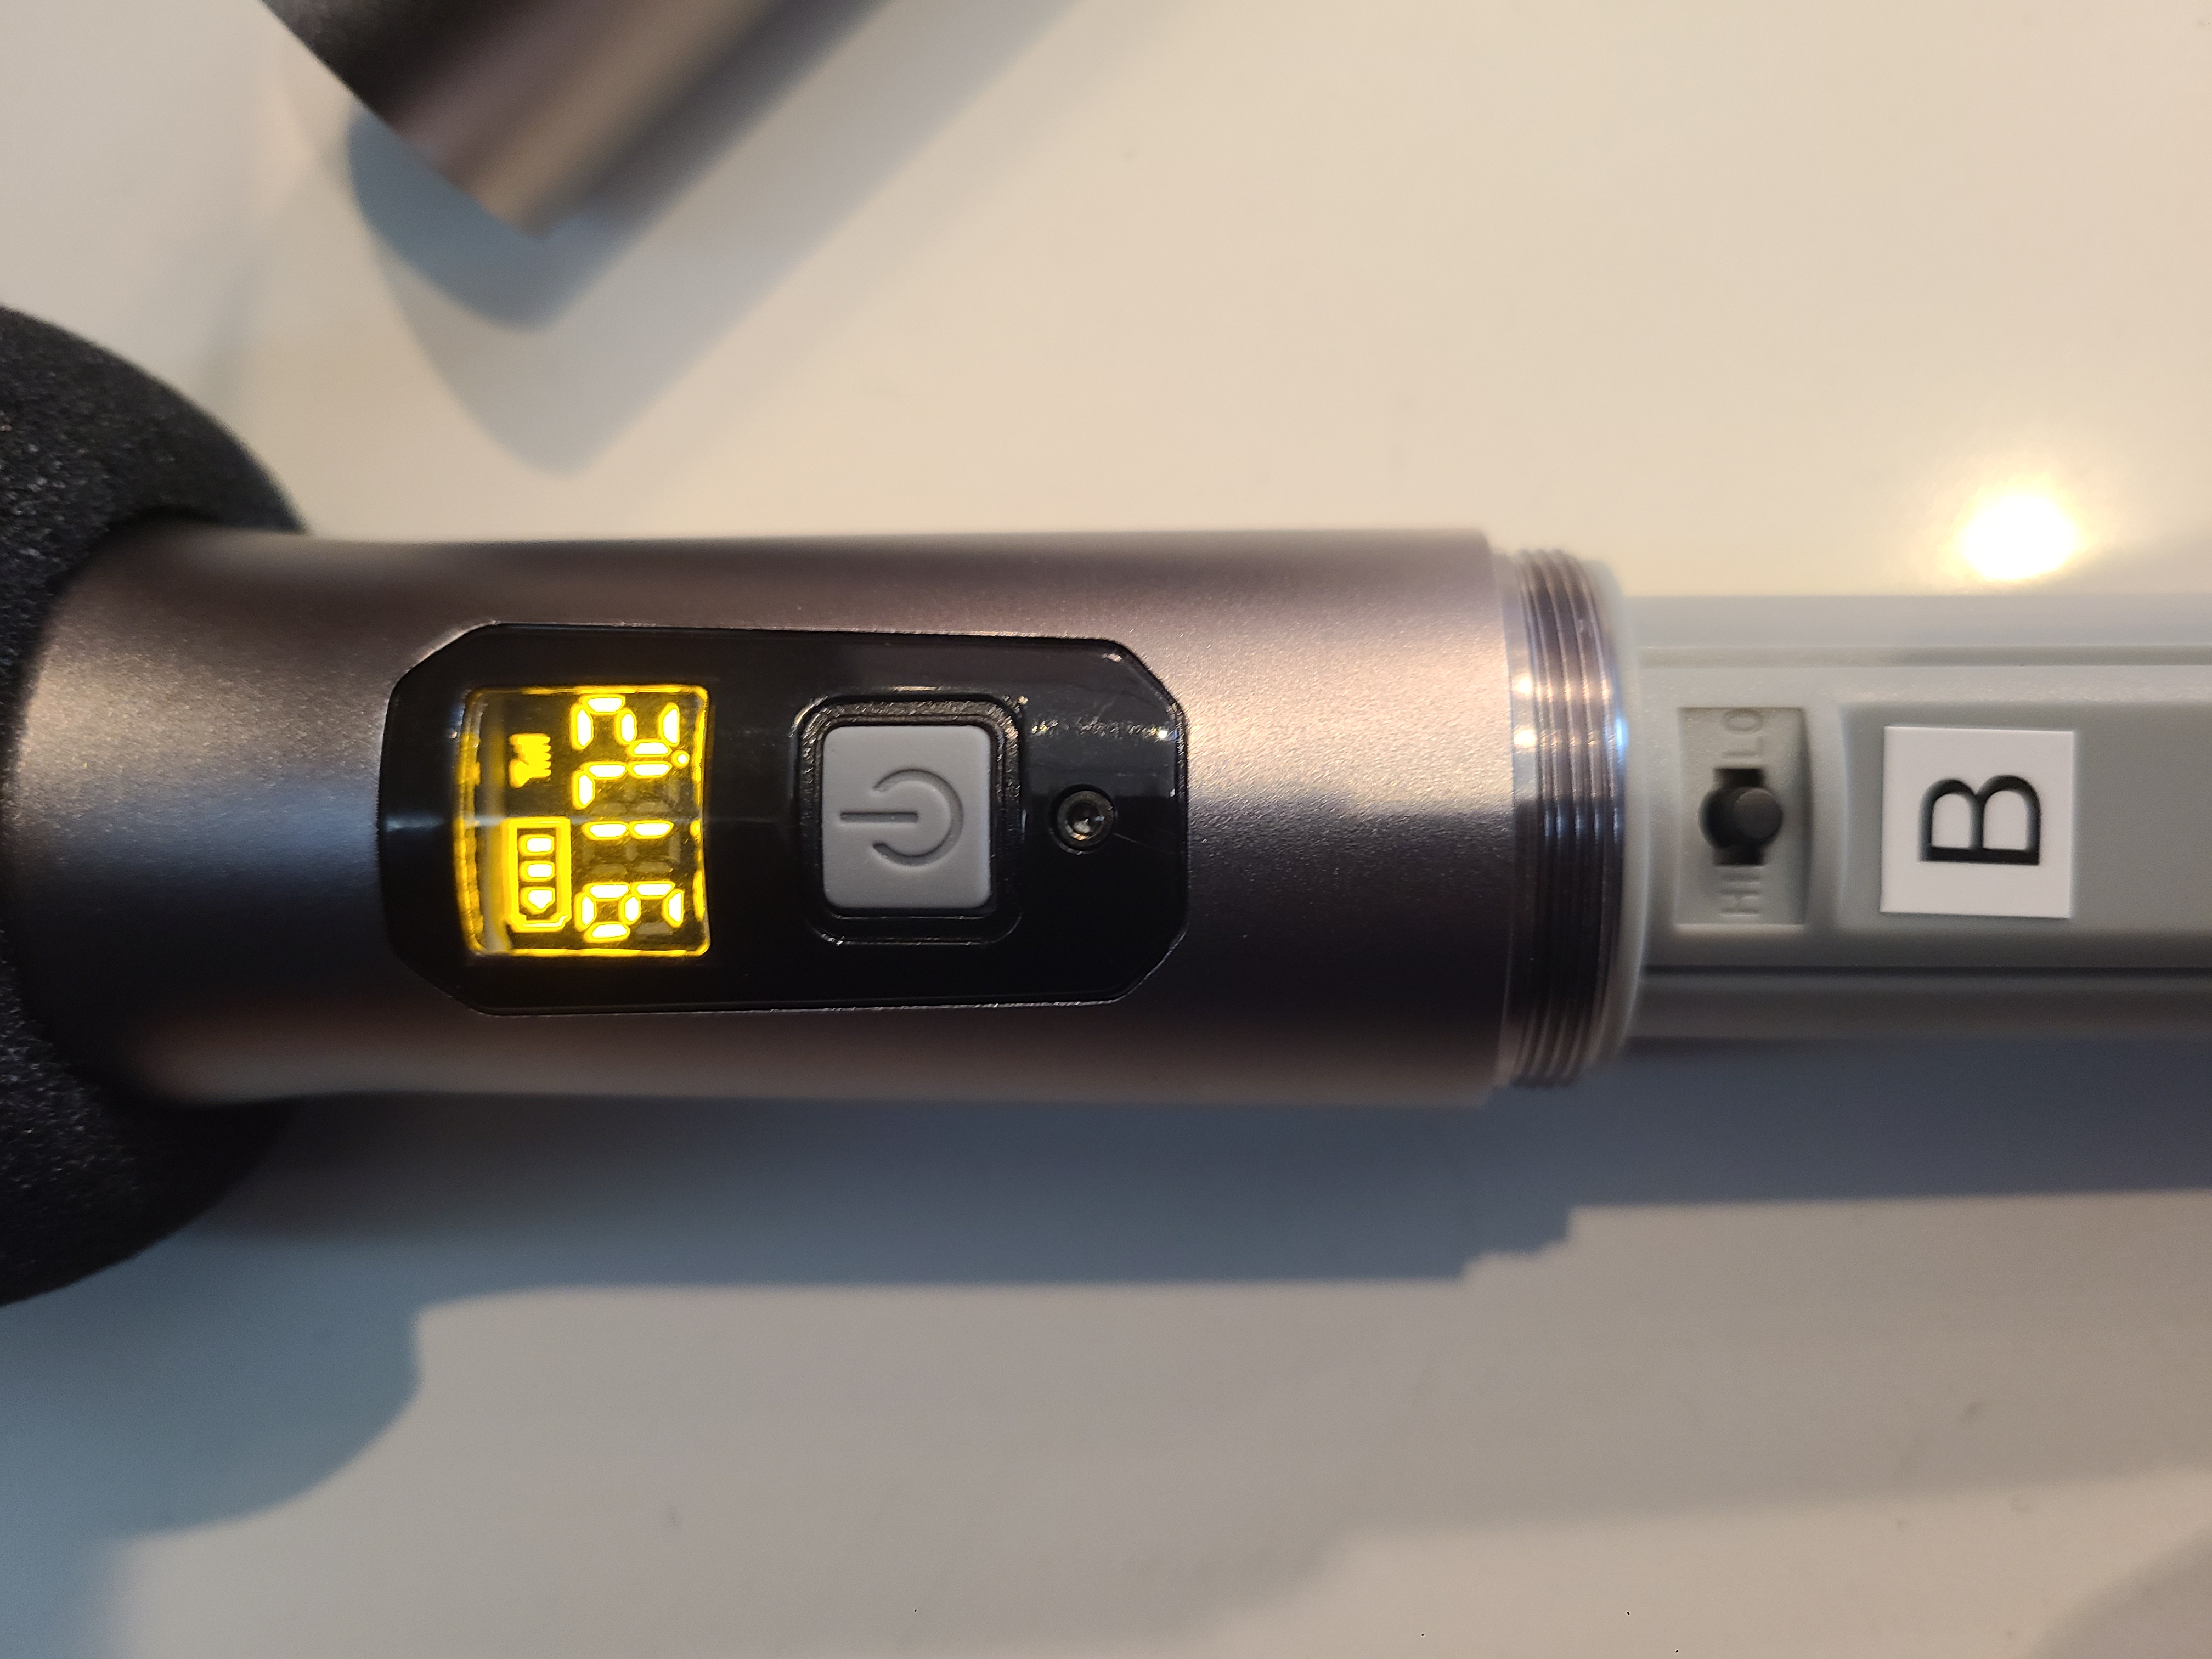
Simply push this switch to the left or the right to move the frequency up or down. The receiver will automatically pick up the microphone on the new frequency, so give it a test and play with it until it works!
